Happy Halloween

Boo!
B is for broomsticks witches to fly,
O is outrageous spooks that go by,
O is for orange pumpkins so bright,
These are the signs of a Halloween night.


 Finally, this is on my list of things to make this weekend. These are too cute and I love anything chocolate. They are so simple to make. Head over to Mrs. Happy Homemaker for the tutorial.


 Today I want to share with you a simple Halloween Vignette of items I already had in my stash of Halloween decorations. I never really understood how to decorate with holiday decor. I always just put it in a spot that looked alright. It just filled a space.
  Instead of just placing them in a hurricane one on top of the other, this year I added the mini skulls with one and placed the other skull on the outside of the hurricane and proped it up on some vintage books. I also placed a famous Dollar Store crow to the top of the books. He looks like he's keeping watch over the room! Creepy and very appropriate for Halloween.
 I decided to add a haunted house to the mix as well. It just fit in with all the black and darkness in this one spot. Isn't it kind of cute?! You never know what you'll find at your local Safeway.
 To keep a bit of lightness to it, all of it sits infront of a mirror. I love how it's all staggered to keep your eyes moving. Halloween Vignettes like this one, adds interest and character to parts of your home. I love when a guest comes over and they stop and take a long peek at what's happening throughout your house. Better yet, your decorations don't look all cluttered and just thrown onto every surface.
 You have to admit, mummy crafts during the Halloween season are pretty darn cute! I've seen so many cute mummy ideas that it was hard to choose just a few. Here are a few that caught my eye this week. Enjoy!
 How fun are these posable mummies made by http://thethrillzofhillz.blogspot.com/2011/10/make-something-posable-mummies.html.
 I could absolutely picture these on my dining room table. Adorable. Check out how http://wraysist3rs.blogspot.com/2011/10/mummy-and-spider-web-bottles.html
 Wouldn't you love to serve these at a Halloween party? I would. Better yet, I would love to eat them...YUM. Get the tutorial from Crystal@ A Pumpkin And A Princess.
Finally, I could see dozens of these cute, Mummy luminaries adorning a mantle. So cute. Check out how to make these@ Hill Country Homebody.
Thank you for joining me for another Friday Favorites. Make sure to visit these bloggers and leave them a sweet comment. Happy Friday everyone!
*If you were featured, feel free to grab a button on my sidebar.
 Today is my Dad's 56Th Birthday. This picture was taken of him with all of his Grand kids this past weekend. It's been 2 years since my siblings and I(with all our kids) have been together at the same time.
  This has to be the easiest thing I've ever made! We went back home for a visit and just missed my Sister, Darcy's Birthday by just a few days. I really wanted to make her something cute for her new house, so I came up with this wreath.
  The grapevine wreath I had on hand, but you could use any wreath form you want. I just started wrapping the feathers around the wreath form using hot glue to attach the ends. When I got about half way through, I tied the sign with some wire around the wreath, then finished wrapping. Really easy....
 and really cute! I wish I had taken a picture of it on my Sister's Red front door. It is absolutely her style. I hope you like it Darcy.
  This is probably the fastest, most satisfying treat I've ever made! I found the idea on Pinterest and it is brilliant. If you have any kind of party to go to and are out of ideas for what to bring...MAKE THESE! All you need is a bag of Hershey Kisses, a bag of Pretzels, and any kind of candy topper that you like. I used Peanut Butter M&M's, but you could use regular M&M's, Candy Corn, Reese's Pieces, etc.
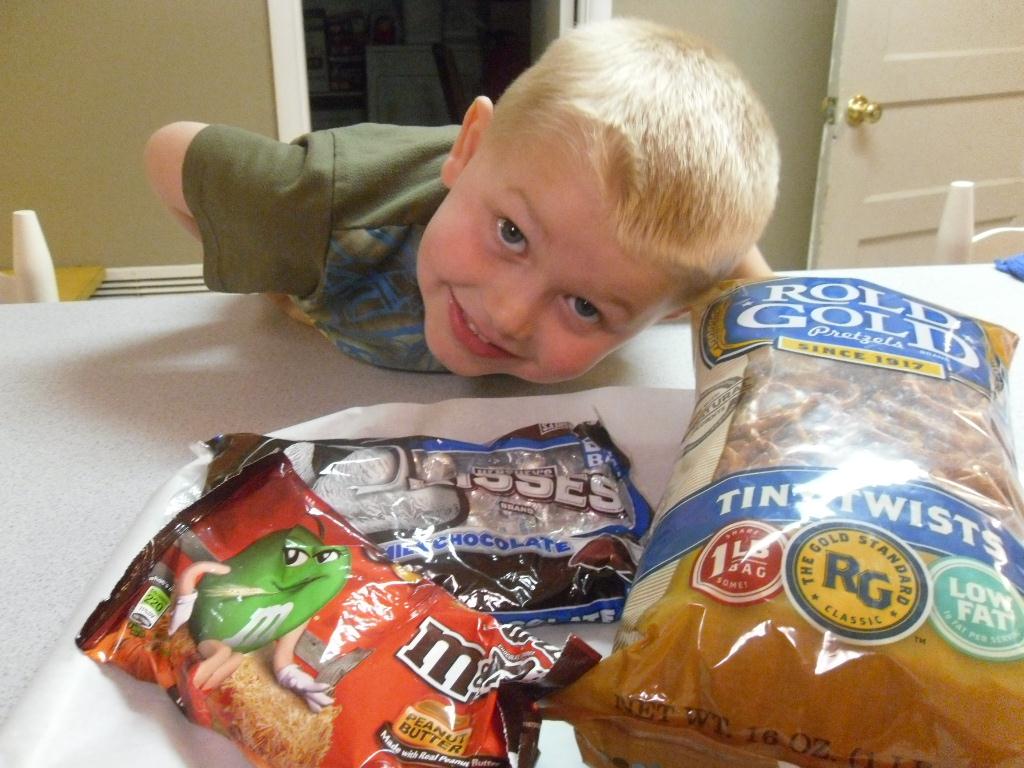 My boys were excited for these and actually helped me with unwrapping the foil off the Kisses. I think they knew that they could probably sneak one in if they helped out.
 All you do is preheat your oven to 250 degrees, place the Kiss on top of the Pretzel and put them in the oven for 3 minutes.
 Here is Easton helping Me put the Kisses on the Pretzels.
 After 3 minutes in the oven, take them out and press your candy topper into the melted Kiss. Let them cool for about 2 hours and Enjoy! It's the perfect combination of sweet and salty. So easy, cheap, and yummy! Hope you'll give them a try.
 Last year at this time, I had only been blogging for a few months. Needless to say, I had very few followers. This is a repeat of a project I did last year that you can see {HERE}.
 All you need is black poster board from the dollar store, some scissors and a template to draw out your bats. I used some painters tape to hang them on the wall and that is it. So easy, yet so dramatic for any wall in your house.
 As you can tell, I finally put up my Halloween decor too! I'll have more posts on that later.
 This little owl was a makeover from the thrift store that you can see {HERE} and the Spell book came from Hallmark several years ago.
 I Love dressing up the house for the month of October. Happy Halloween decorating to you. More to come!


