Monday, October 4, 2010

Black Bean Brownies


My husband and I started counting our food points(weight watchers). We are doing well so far, but every now and then, I really want CHOCOLATE! I found this recipe online and the brownies are only 2 pts per serving.
*This recipe makes 20 servings.
I know what you're thinking...Gross, black beans in the brownies!!! Trust me they are just as good if not better. You would never guess that there is beans in this recipe. Plus you get fiber and protein!!!!

First, open the can of black beans and drain the liquid. Rinse them off with water and put them in a blender. Add one can of water to them and set the blender on puree. Let them puree for about 3 min. You want it nice and smooth.

Looks like chocolate, huh?! Well, this part does not smell like chocolate, but don't let that change your mind about making them! Mix the bean puree into one box of brownie mix and combine well.

Line a 9x13 pan with foil. This way you don't have to use any oil on the pan adding any extra calories. Plus it makes for easy clean up. When they are done baking at 350 degrees for 30 min. (or when you put in a skewer and it comes out clean)let them cool and pull the foil out of the pan. Cut into 20 squares *remember, this will make them 2 pts per square

Eat and Enjoy...I promise, they are DELICIOUS!!!

I linked up to these parties:


mmm button


Join  us Saturdays at tatertotsandjello.com for the weekend wrap   up           party!

Photobucket
My Second Award

I received my second Versatile Blogger Award via Michelle @ http://afullcottage.blogspot.com
Thank you, Thank you, Thank you to Michelle for the recognition.

Wednesday, September 29, 2010

GLITTER SKULLS

I've been wanting to do this project since I saw Martha's Glitter Skulls in last years Halloween issue of Martha Stewart Living Magazine!
I couldn't find a reasonably priced large skull, however I found these paper mache' skulls at MICHAELS for $1.99ea. Not too shabby!
The Elmer's Glue I had already, but the Martha Stewart Onyx Glitter I also found at MICHAELS. This cost $4.99. It's a little more than I like to spend, however, I barely used any for this project so it will last me for several more crafts :)
First, I painted the skulls with just regular, black acrylic paint. I didn't want any of the paper mache' to show through the glitter.
Next, I watered down the Elmer's glue, painted it on the skull in little sections and sprinkled on the glitter.
*Make sure to work over a plate or something to catch the excess glitter. Pour the excess glitter onto a creased piece of paper so you can pour all the unused glitter back into the container. No waist here! Let it dry for and hour or two and....

VOILA!!! I LOVE IT!
I also had those cute little dollar store skulls and some dark rocks that I put in the bottom of the hurricane, stacked the skulls and it turned out wonderful.
Finally, I have a completed Martha inspired decoration for Halloween!
I linked up to these parties:

Photobucket


NightOwlCrafting


UndertheTableandDreaming

Friday, September 24, 2010


BATS

A $1 Project

This very inexpensive project couldn't be easier. I got the inspirations from a picture I saw in the Country Living Magazine. Mine is not as substantial or outdoors, but for our small apartment, it does the trick. Older children that can use scissors can even help out with this project! It took about an hour to complete from start to finish. All I did was purchase two large, black poster boards from the Dollar store(.50 cents ea.) This entire project was only $1!!!!! I drew and cut out a bat and used that as a stencil to trace on several bats to my poster board. Then just start cutting!

My little collection of bats growing as I watched Sports Nation...Yep! I watch Sports Nation :)

Then, I used double sided tape the adhere them to the window. They look awesome at dusk!

I even put a few on the edges of the window and bent their wings to make then appear as if they are flying.

A fun little project that cost $1.
I'm linking this project to:


Join  us Saturdays at tatertotsandjello.com for the weekend wrap up           party!


mmm button


Thursday, September 23, 2010

CHOCOLATE Cookies

This is a delicious, easy recipe that was in my Mom's recipe box! It was given to her by a family friend years ago, and I thought I'd pull it out and give it a try. It originally calls for peanut butter chips, but I had M&M's on hand.
(they are the fall colored M&M's so they worked perfect!)
My son Easton was seriously ready to taste them!! Hope you'll give them a try, ENJOY!
1 1/4 Cup Butter or Marg. softened
2 Cups Sugar
2 Eggs
2 tsp Vanilla Extract
*Beat together Butter and Sugar till light and fluffy then add the Eggs and Vanilla
*In a separate bowl mix together these dry ingredients:
2 Cups Flour
3/4Cup Cocoa
1tsp Baking Soda
1/2 tsp Salt
*When these are combined, slowly add into the wet ingredients.
Then gently fold in 1 bag of M&M's
(again, you can substitute with peanut butter, or white chocolate chips..whatever taste you like)
You can make these as big or as small as you like :)
Bake @ 350 degrees for 9-10 min. If they are bigger, 10-13 min
ENJOY!
I linked up to these parties:


MY VERY FIRST AWARD!!!

This award came from Liz at Project Naptime!
I just want to thank her for the recognition. Blogging is a new found LOVE for me and I never expected anyone but a few family members would follow along with me. This award is very flattering. Being awarded for something I have fun doing...what a treat.
So, along with this award, I am supposed to Thank and link back to the blog that awarded this to me.
Thank you Project Naptime
Next is posting 7 things about myself:
1. I grew up in Western Washington, but just over a year ago my husband, two boys and I moved to Eastern Washington.
2. I love Martha Stewart
3. My favorite movie of all time is It's A Wonderful Life
4. I have two of the cutest little boys, Jaxon and Easton
5. One of my favorite restaurants is The Crab Pot in Seattle, WA
6. I LOVE summer
7. One thing I must have every day is coffee!
Next is giving this award to 15 blogs I love to follow and letting them know! In no particular order, here they are:
1. Better After
2. Beyond The Screen Door
3. I Heart Naptime W/ Chocolate Sundaes
4. Lemon Tree Creations
5. One Crafty Chick's Creations
6. Sawdust And Paper Scraps
7. Someday Crafts
8. Susie Harris
9. Sweet Something Designs
10. Tatertots and Jello
11. The Shabby Nest
12. This Blessed Nest
13. Tweedle Dee Designs
14. Under The Table And Dreaming
15. The Painted Rooster

Thursday, September 16, 2010

Salt Dough CANDY CORN
During the fall/Halloween season, I normally use real CANDY CORN to surround a candle in a glass hurricane! This year, I thought it would be fun to try something a little more substancial. Not only was this a fun project, but it was really easy and very frugal. Here is what you'll need:
1 Cup Salt
1 Cup Flour
1/2 Cup Water+ a little more if your
mixture isn't coming together
Pretty much everything you probably have on hand!!


Mix together till you form a ball

Next, preheat your oven to 200 degrees while you're sculpting your
CANDY CORNS.
This takes a little time to get the right shape, but after a while it is really easy. I just took a knife to create the lines that separate the 3 colors.

Line them up on your baking sheet and stick into your 200 degree oven for 2 hours. I checked them every 30 mins or so to make sure they weren't burning. I even let them sit 24 hours after to completely dry them out.

Next, you might have some rough edges...just take an emery board or a fine piece of sandpaper to scrape them off. (notice the little, helping hands...my son Jaxon helping Mommy)

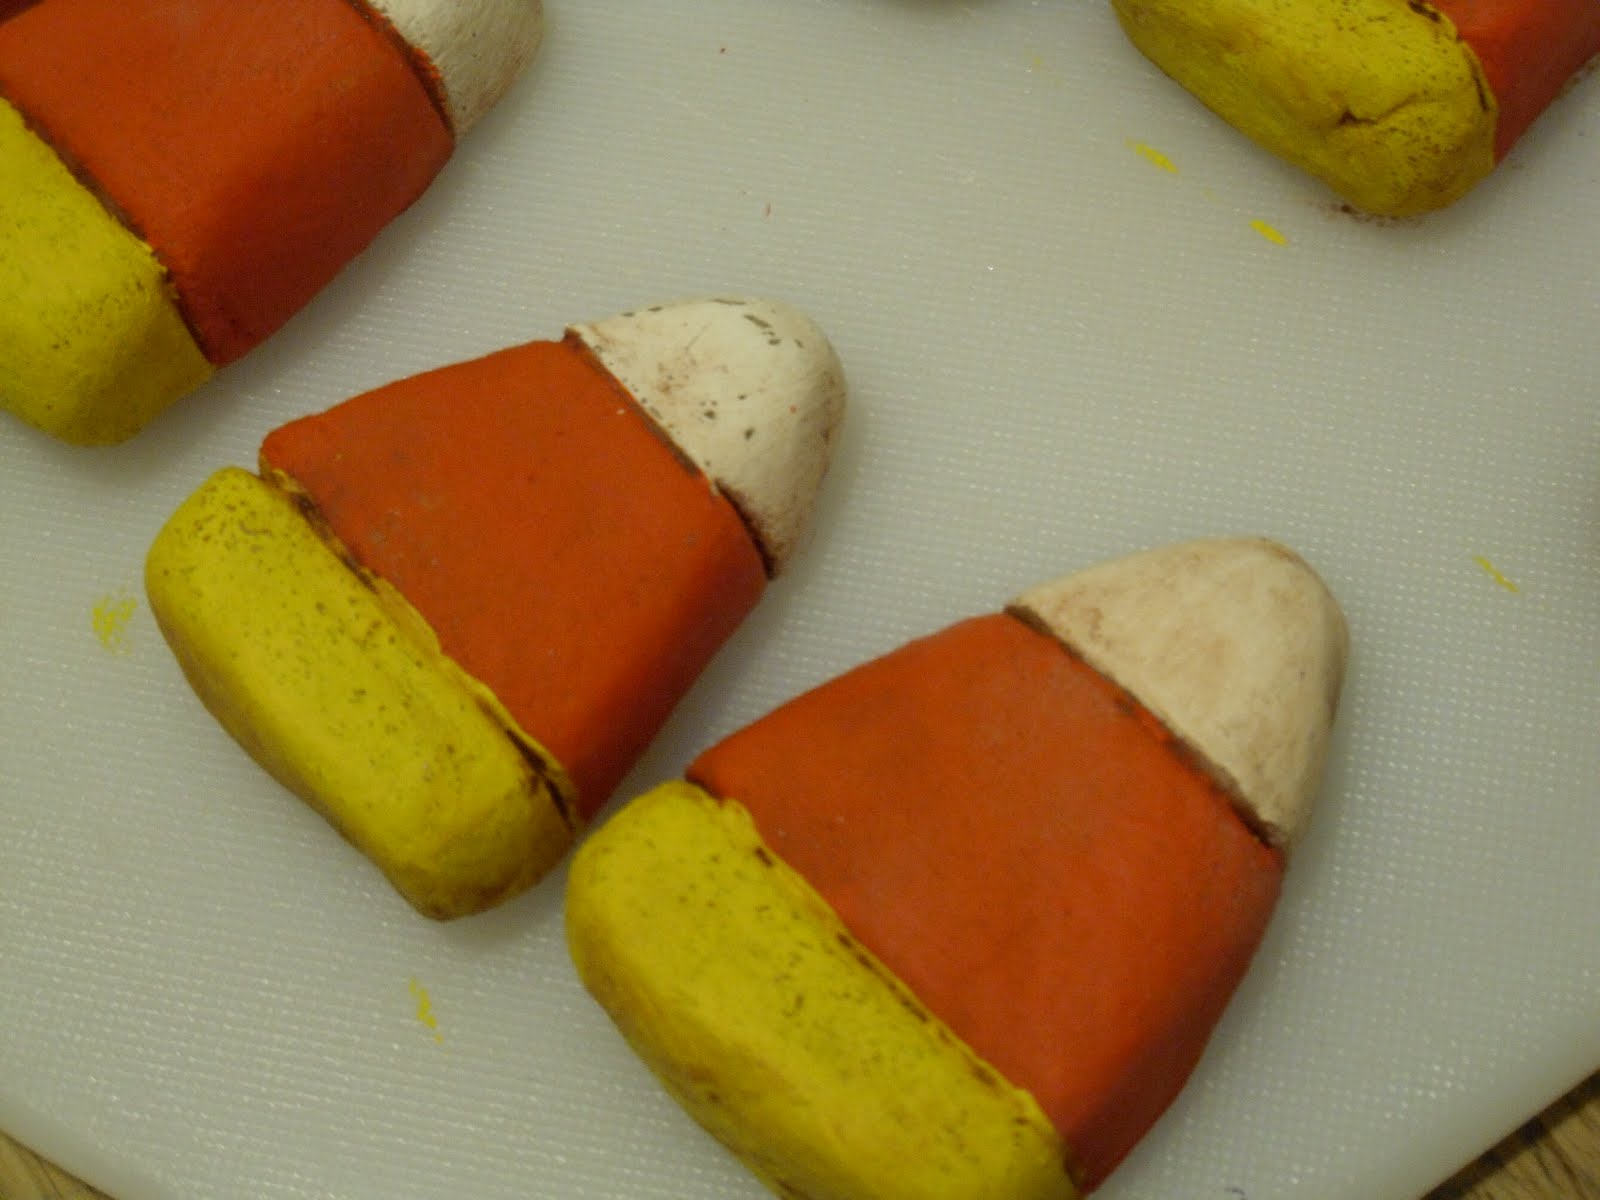
I used the traditional White, Orange and Yellow! The Folkart paints I bought at Wally World for .99 cents each. Three dollars for this whole project is not too shabby!

Fun, bright colors; however, I wanted them a little more muted and antique looking. A little bit of watered down brown paint does the trick. * Just be sure to wipe it off quickly because it adheres to white paint very fast and you just want a hint on brown!!!

Drying....patiently waiting :)

Finally, into the hurricane they go. They are soooo cute! I love how they turned out.

Something FUN, FRUGAL and DIFFERENT for Halloween this year.
I Love CANDY CORN!
I linked up to these parties:


Join  us Saturdays at tatertotsandjello.com for the weekend wrap up          party!


Photobucket


UndertheTableandDreaming